The shiny new Tray of Doom was put through it's paces in the Battleshed recently, with a welcome return visit by club member (and chairman - all hail, bow, doff cap etc.), David Knight and his lovely dog, Beau. And he brought along two copies of Neil Thomas' Wargaming Nineteenth Century Europe 1815-1878 and a box of 15mm miniature adversaries. And I broke this years pledge. Technically.
David had mentioned he wanted to try out a new set of rules so a weekend Battleshed session was the perfect opportunity. I wasn't sure what he was bringing along though, so for me it was a bit of a blind date (rule-wise!). It proved to be a very pleasant and entertaining mornings' gaming too, with a midway break between games for a walk in the nearby woods with Beau to stretch the legs. What David had been feeding his mooch I don't know but he sure used up a lot poop bags. Beau that is, not David!
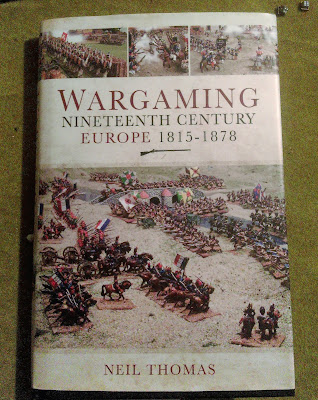
These rules from Neil Thomas (Pen and Sword, Hardback edition, £19.99) - Wargaming Nineteenth Century Europe 1815-1878 - are a set of what the blurb describes as deceptively simple yet effective wargaming rules, covering a period of European conflicts where rapidly developing tactical and technological advances vied with the old Napoleonic doctrines. And I can report, even for this speculative historical wargamer, that these rules proved to be just as advertised; fast playing and yes, deceptively simple to play.
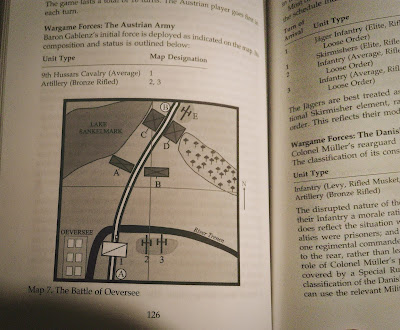
In fact, out of the 193 pages of the hardback copy of the rules, only 8 pages actually cover the core rules! They are preceded by a brief chapter explaining the concepts for each phase of the game, but experienced wargamers can simply get stuck straight in. The rest of the book provides an overview of the major conflicts, analysis of the tactical and strategic developments, a selection of generic scenarios (flank attacks, rearguard actions, pitched battles, meeting engagements), 28 different army lists and 12 complete historical scenarios, all with their own brief historical background, deployment maps, Orders of Battle and special rules. All this interspersed with 16 pages of full colour plates showing various tabletop armies in action. Oh, and a Bibliography and supporting appendices. Phew!
If all that came with an impenetrable set of rules and tables then it would likely be left on the shelf by any non-historical wargamers looking for an undemanding shoe horn into his area of our hobby. But it doesn't. Instead, as proved by our two games using the Battle of Oeversee scenario, it really is a simple, fast-playing element based game. Both the generic and historical scenarios are designed to be played on physically manageable table sizes, typically between 120cm (4') x 90 (3') or less for those using smaller scale miniatures. And the 'army' sizes required to play are small too. Helpfully, the author has even included a guide for newcomers to wargamimg, covering figures sizes, scales and a rough pricing guide for gathering an army to play out a scenario.
What do you need? You'll need a bunch of D6, (Tray of Doom optional!) a tape measure and your miniatures of course. There are basing guidelines, but the rules are designed to play with whatever based miniatures you have. No points involved, this is challenging scenario based gaming after all!
How do the rules work? The sequence of play comprises two player turns, where each player works through 5 main phases - Changes of Formation, The Charge Sequence, Movement, Firing, and Hand-to-Hand. Morale is also tested at certain points if applicable. Then players hand over to their opponent. As mentioned, the rules cover only 8 pages and are clearly laid out in sequence, supported by simple and compact reference tables for each stage. Each scenario comes with its own set of special rules and options representing the unique historical flavour of the encounter.
For example, Firing is simply a case of referencing the relevant tables to test which elements can fire (Field of Fire, Observation, Firing elevations) at what Range and how many dice per base, depending on type of weapon being fired. A quick check on the firing table against the defending units current 'class' (based on type and formation) tells the attacking player what they need to roll to Hit.
The Defending player attempts a Saving Roll against any Hits, depending on their class and current location. Each saved roll cancels a hit. For every four hits acquired, a base is removed from the defending player. If under four hits remain, to total is carried over until the next combat is resolved. It's that simple.
Basing is simple too. Infantry have 4 bases, Skirmishers 2, Cavalry and Dragoons 4, Artillery a gun and 4 crew on a single base.
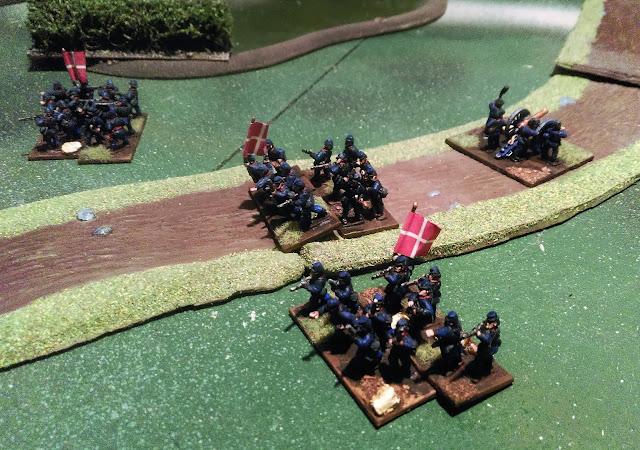
David brought his latest online auction procurement - a painted Danish and Austrian 15mm army, complete with cavalry and artillery. Very nice. Its almost as if he had our scenario in mind!
The battle: We played two games of the Battle of Oeversee (or 'Sankelmark', 1864), a minor battle during the Second Schleswig War, between retreating Danish forces fighting a rearguard against the advancing Austrians, swapping sides after the first game.
The Austrians won only if there were no Danish units within 12cm of a road running between their entry points by the end of 10 turns. Historically, the Austrians (commanded by Baron Gablenz) 'won', after a bloody battle and only after a successful Danish fighting withdrawal (commanded by Colonel Max Müller) late in the day, despite being outnumbered by the Austrians. And that's how it pretty much played out for our two games!
 |
| The Austrian reinforcements arrive! |
 |
| Danish Infantry take up defensive postions to try and delay the Austrian advance |
The Infantry had also by now got to grips with the Danish and is became a battle of attrition until the rest of the Austrian reinforcements arrived, marching in column up the road and over the river bridge. It sure was bloody fighting up to that point, with the Danish infantry putting in a fierce bayonet charge and halting my Austrians - which was pretty much what actually happened! From then on, the Austrians made slow progress pushing David's Danish forces back. By the end of turn 10 he still had units, although battered, in position near the road at his deployment points. The Danish took the scenario win!
 |
| Rash, brash and ill fated charge of the Austrian 9th Hussars into a Danish infantry column |
This was our inaugural game using these rules and for me only minutes spent reading them prior to the game. But bloody hell it was fun! And similar to what happened on the actual day too! For the second game, the Danish weren't so lucky - mainly because they now had me as their commander. By the time I realised I'd advanced my massed line of Infantry too far into the Austrian artillery range it was too late.
Then there was a flurry of confused Danish repositioning, mostly in the rearward direction, allowing time for the Austrian reinforcements to form up and make themselves busy with their rifled muskets, followed by multiple bayonet charges at my thin and wavering Danish line. One Danish element of Infantry must have become battle crazy, or more likely, mutinied given their current commander's ineptitude; they decided it was better to head off on their own to try and out flank artillery. Heroically, under fire. It didn't go well! The whole Danish line soon crumbled and retreated.
 |
| Danish deployment, game two |
With Beau the dog getting restless for 'walkies' and me wondering when our cat, Wookie, after her 12 hour nap would make a potentially explosive fur n' claw appearance in the garden upon discovering a dog in her domain, we called it a day. I thoroughly enjoyed these two games, enhanced by the accessibility and appeal of the rule book. Neil Thomas (also, One-Hour Wargames, Wargaming: An Introduction, Ancient & Medieval Wargaming, Napoleonic Wargaming) has done a fine job indeed.
These are rules clearly designed to be as accessible as possible for newcomers, whilst providing satisfying historical outcomes for veterans. Whether or not the latter actually succeeds for the more fusty historical wargamer types I cannot comment as I simply do not have enough historical wargaming experience to contrast and compare differing rule sets. But what I can say is that these rules definitely nail the important accessibility objective.
The proof of that is, well...ahem, I've technically broken my 'no new system' rule for this year. I ordered a copy. Technically, does only buying a copy of the rule book count? I haven't actually put any miniatures together specifically for these rules. Yet. But mini-project plans are already afoot between myself and David. I'm trying to sit on a very precarious metaphorical fence with this no new system resolution! A big thanks to David (and Beau!) for the games.


No comments:
Post a Comment